j-CODEHOP tutorial
NOTE: This tool requires Java Runtime Environment 1.7 or higher. Download it here: Java Runtime Environment.
This tutorial provides a step-by-step procedure on how to create CODEHOPs with j-CODEHOP, using sequences of uracil DNA glycosylase as an example.
- Download the sample FASTA file by clicking here. This file contains the amino acid sequences of uracil DNA glycosylase from 11 different strains of poxviruses obtained from the VOCs database.
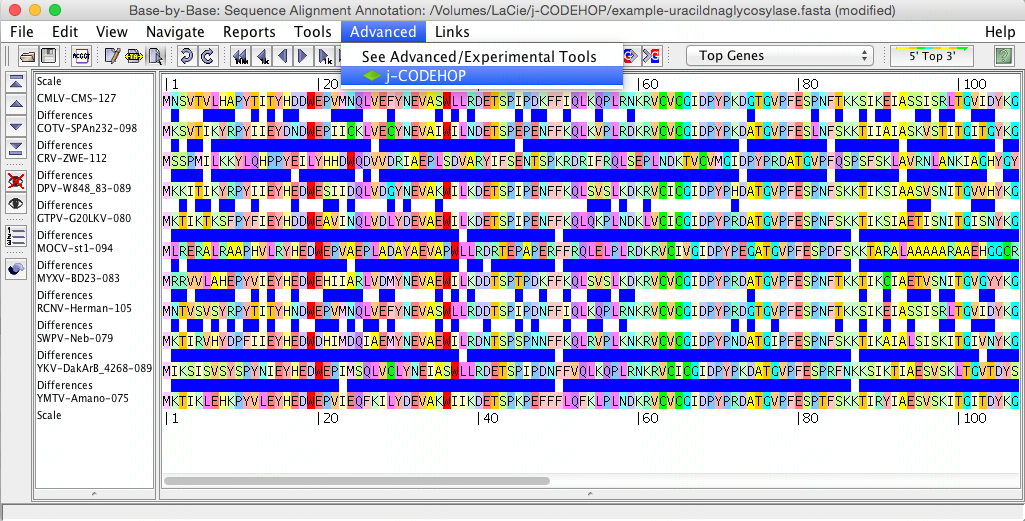
- Import the file into Base-by-Base (at this stage the proteins are not aligned).
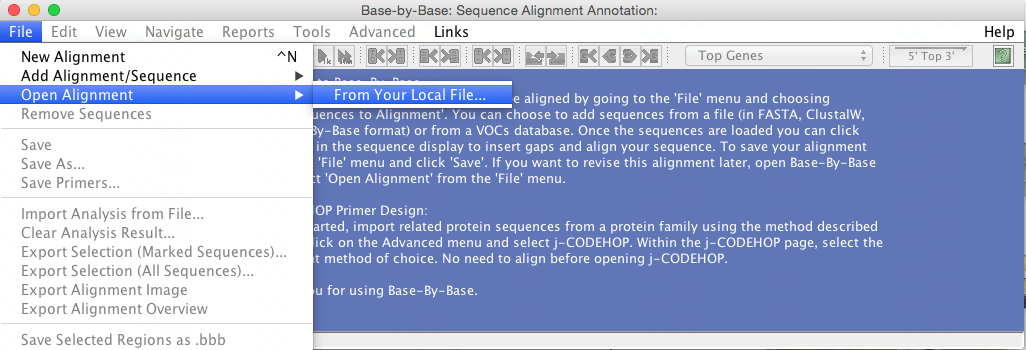
- Run j-CODEHOP under “Advanced” in the Base-by-Base toolbar.
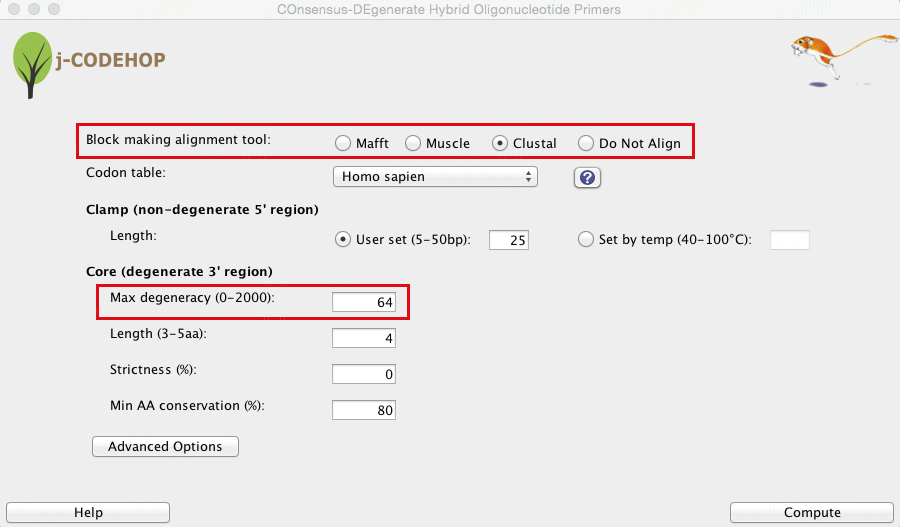
- The j-CODEHOP window will open. Select the alignment tool you would like to use, set your parameters, and hit compute. In this example, alignment was performed with Clustal (in figure above, the sequences are not yet aligned) and the Max degeneracy was set to 64 (in order to increase primer number). Tip: for more ways to increase the number of primers generated, please see the j-CODEHOP How-to Guide.
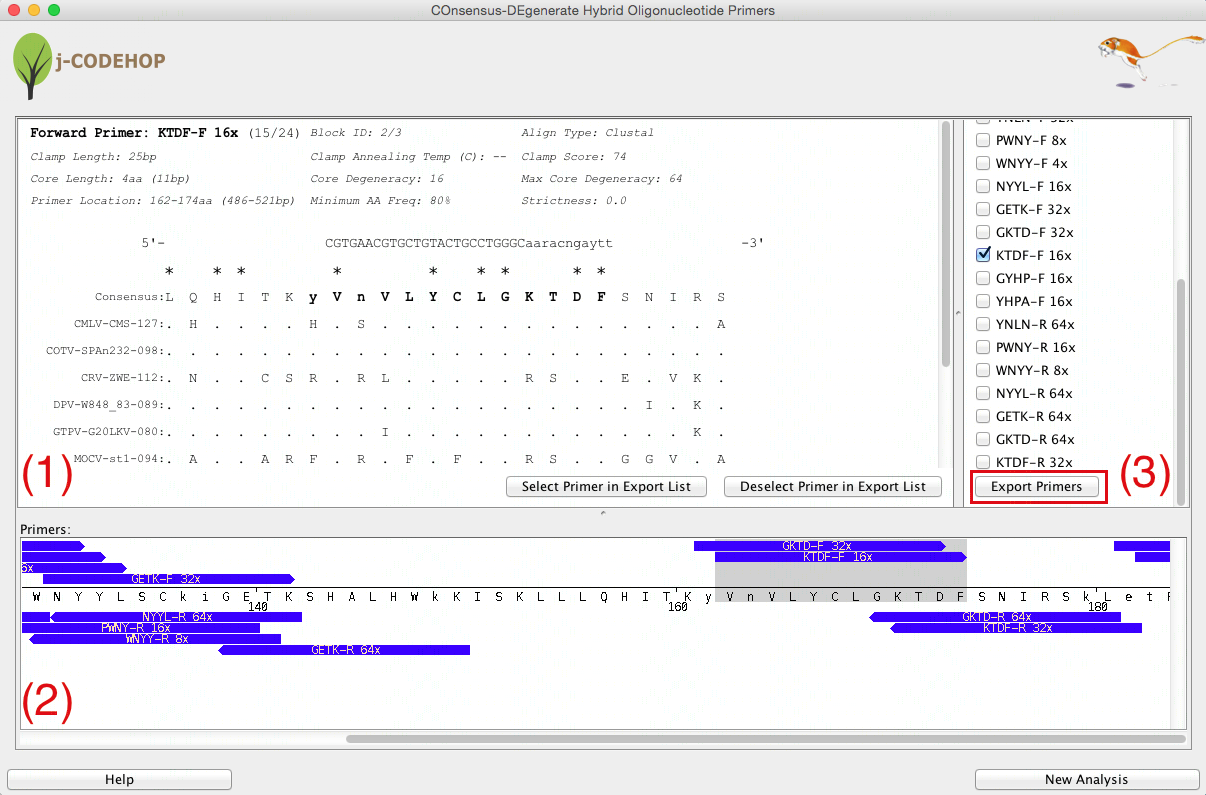
- j-CODEHOP will run and a new window will appear. This window will display three separate sections. (1) shows the details about the selected primer. (2) displays a list of all the primers generated which the user can select for export. The primers are grouped into Blocks - conserved amino acid regions from the aligned sequence with no gaps. (3) shows the location and direction of the primers within the aligned amino acid sequence.
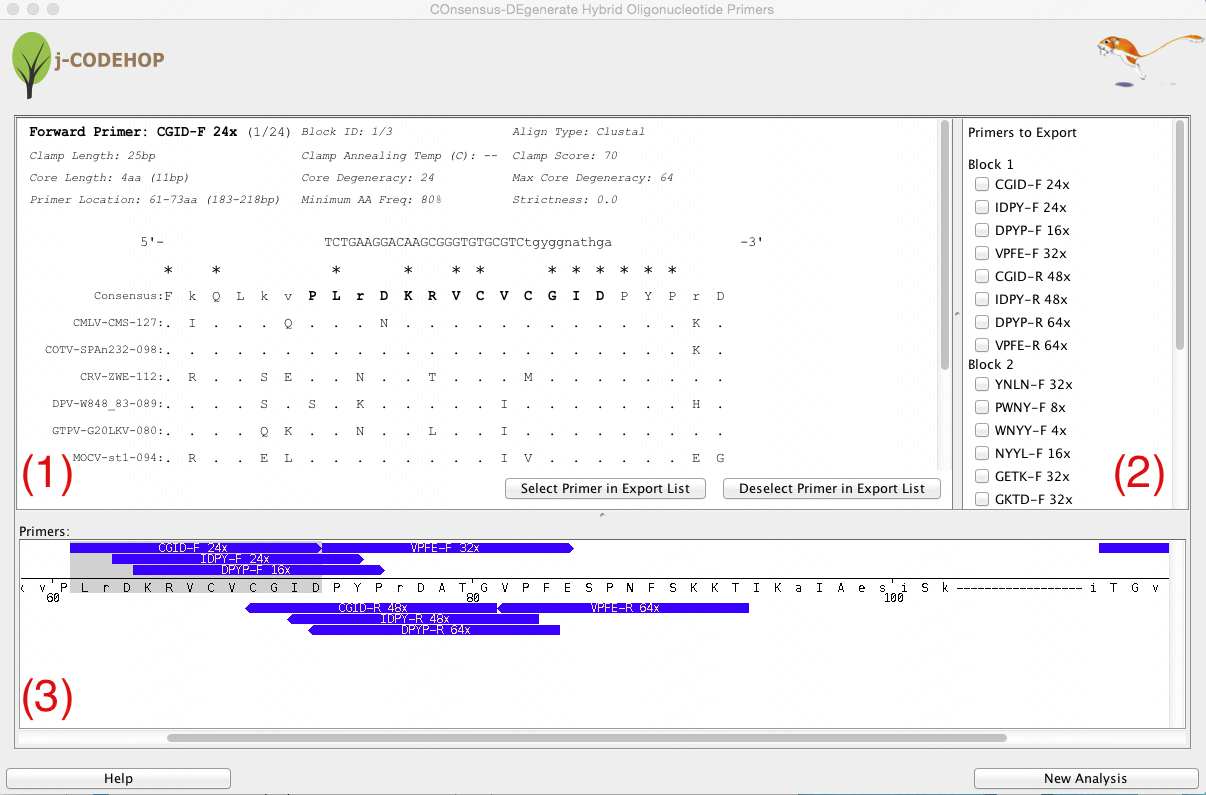
- In this example 8 primers were generated in block 1, and 16 primers in block 2. A variety of forward (13) and reverse (11) primers can be seen.
- Scroll through Section (3) to view the various primers that were generated. Try to find CGID-F (a forward primer with core degeneracy of 24 in block 1) and KTDF-R (a reverse primer with a core degeneracy of 32 in block 2). Clicking on the blue primer will open more information about the primer in Section (1). Click “Select Primer in Export List” to select the primer for export.
- After primers are selected, scroll down in Section (2) and click “Export Primers”. In this example, CGID-F and KTDF-R were selected for export.
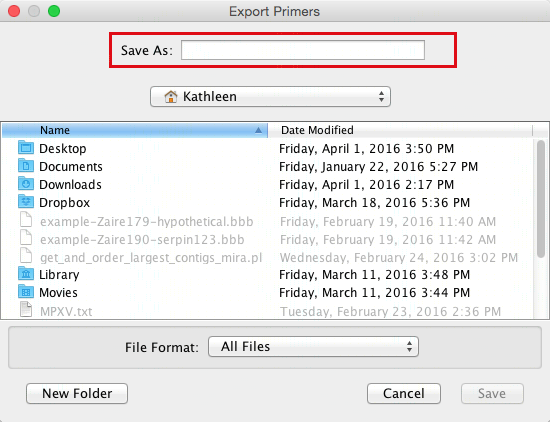
- Name and save the file. The file will save in .csv format.
- The file can now be opened on Microsoft Excel (or a similar spreadsheet program).
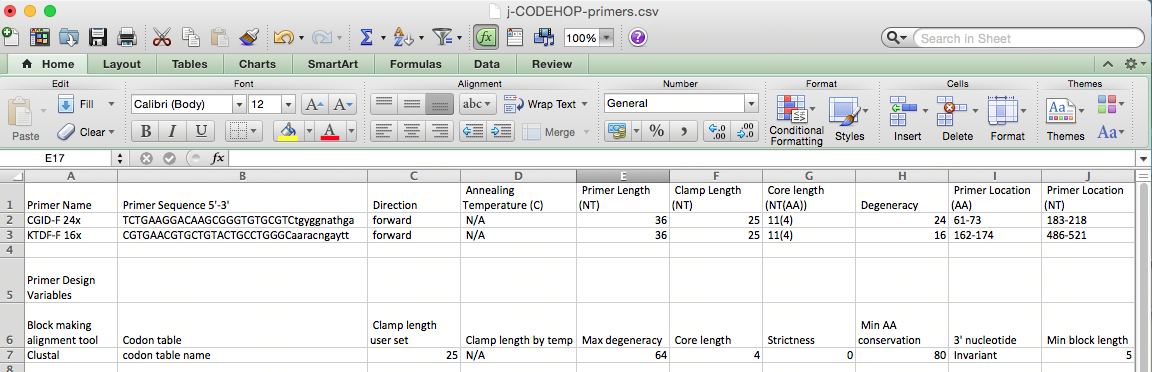
- Primer information including the location, amino acid sequence, nucleotide sequence will be displayed. Not all the nucleotides in the primer core will be A, T, C or G as the primers are degenerate, and created to match all possible nucleotide sequences from the amino acid sequences using the degenerate IUPAC codes (R = A or G, Y = C or T, S = G or C, W = A or T, K = G or T, M = A or C, B = C or G or T, D = A or G or T, H = A or C or T, V = A or C or G, N = any base). For example, the CGID-F primer nucleotide sequence displayed is:
TCTGAAGGACAAGCGGGTGTGCGTCtgyggnathga
The primers will always be displayed 5’-3’ whether a forward or backward primer. The uppercase region is the clamp, and the lowercase region is the degenerate core. The degeneracy of 24 comes from the y, n and h in the sequence. Based on the IUPAC nucleotide code Y = C or T, N = any base, H = A, C or T; therefore, 2 x 4 x 3 = 24 primers in the CODEHOP pool.
Primer location for CGID-F is at 183-218 nt, and for KTDF-R at 511-547 nt: creating a 364 nt PCR product.
The degeneracy of the two primers should allow targeting of diverse uracil DNA glycosylases across other species and organisms.
PLEASE REMEMBER TO CITE THE PROGRAM!
